Friday, July 19, 2013

Queen's Braid

Hola (hello)! Como estas (how are you)? This is a queen's braid and since there wasn't an explanation for it, I'll explain for you. 

It's exactly like a French braid, except you only add hair from one side! Very simple and easy to do if you can French braid. Good luck!
July

*source: Pinterest


Friday, July 12, 2013

Ombre Knotted Bracelet

Hello! How might all the cliquers be? How's summer? Anyway, here's a sweet bracelet that would look really cool with just about anything!
July


Saturday, July 6, 2013

Hedgehog Cookies :)


Heyyy! These are adorable so I thought I'd share :) 
July

*SOURCE


You'll Need:

  • 1 cup butter or margarine, softened
  • 3/4 cup sugar
  • egg
  • 1/2 teaspoon vanilla extract
  • 2 1/2 cups all-purpose flour
  • 1 teaspoon baking powder
  • 1/4 teaspoon salt
  • Melted Chocolate chips
  • Crushed walnuts

Directions

  1. In a mixing bowl, cream butter and sugar. Add egg and vanilla; mix well. Combine flour, baking powder and salt; add to creamed mixture and mix well.
  2. Form cookies (in an oval shape with a pointed end) and place 2" apart on on ungreased baking sheets. Bake at 375 degrees F for 6-8 minutes or until set but not brown. Cool on wire racks.
  3. Dip 3/4 of cookies in melted chocolate and then in crushed walnuts. Dot two eyes and a nose!

Sunday, June 30, 2013

Tie Dye Swimsuit Cover-Up


Hello! It's July again and since it's summer, here's a cute swimsuit coverup that you can make by yourself!


Before & After
Supplies needed:
A white t-shirt (I bought a large, and I usually wear a medium t-shirt)
Tie Dye kit
Needle & thread

You can tie dye your shirt however you want, but if you want a spiral effect like mine, here are the steps!
1. Pinch your shirt wherever you want the center of your swirl to be.
2. Swirl your shirt around your pinch until it’s compact.
3. Divide your shirt into 6 sections with 3 rubber bands.
4. Squirt your dye in each section. Try not to overlap your colors.
5. Place shirt in a plastic bag for about 8-14 hours.
6. Rinse shirt in the bathtub.
7. Wash your shirt by itself on hot in a large sized load.

As for the braided racer back steps:
(adapted from TheSorryGirls on Youtube)
Lay your shirt out flat.
1. Starting about 1 ½ inches below the bottom of your sleeve, cut one sleeve off of your shirt, creating a U-shape.
2. Use your cut-off sleeve as a pattern to cut off your other sleeve. (Save those sleeves for later!)
3. Flip your shirt over so the back is face-up. Cut the back sleeves of your shirt, making the holes bigger ONLY in the back, making a wide racer-back shape.
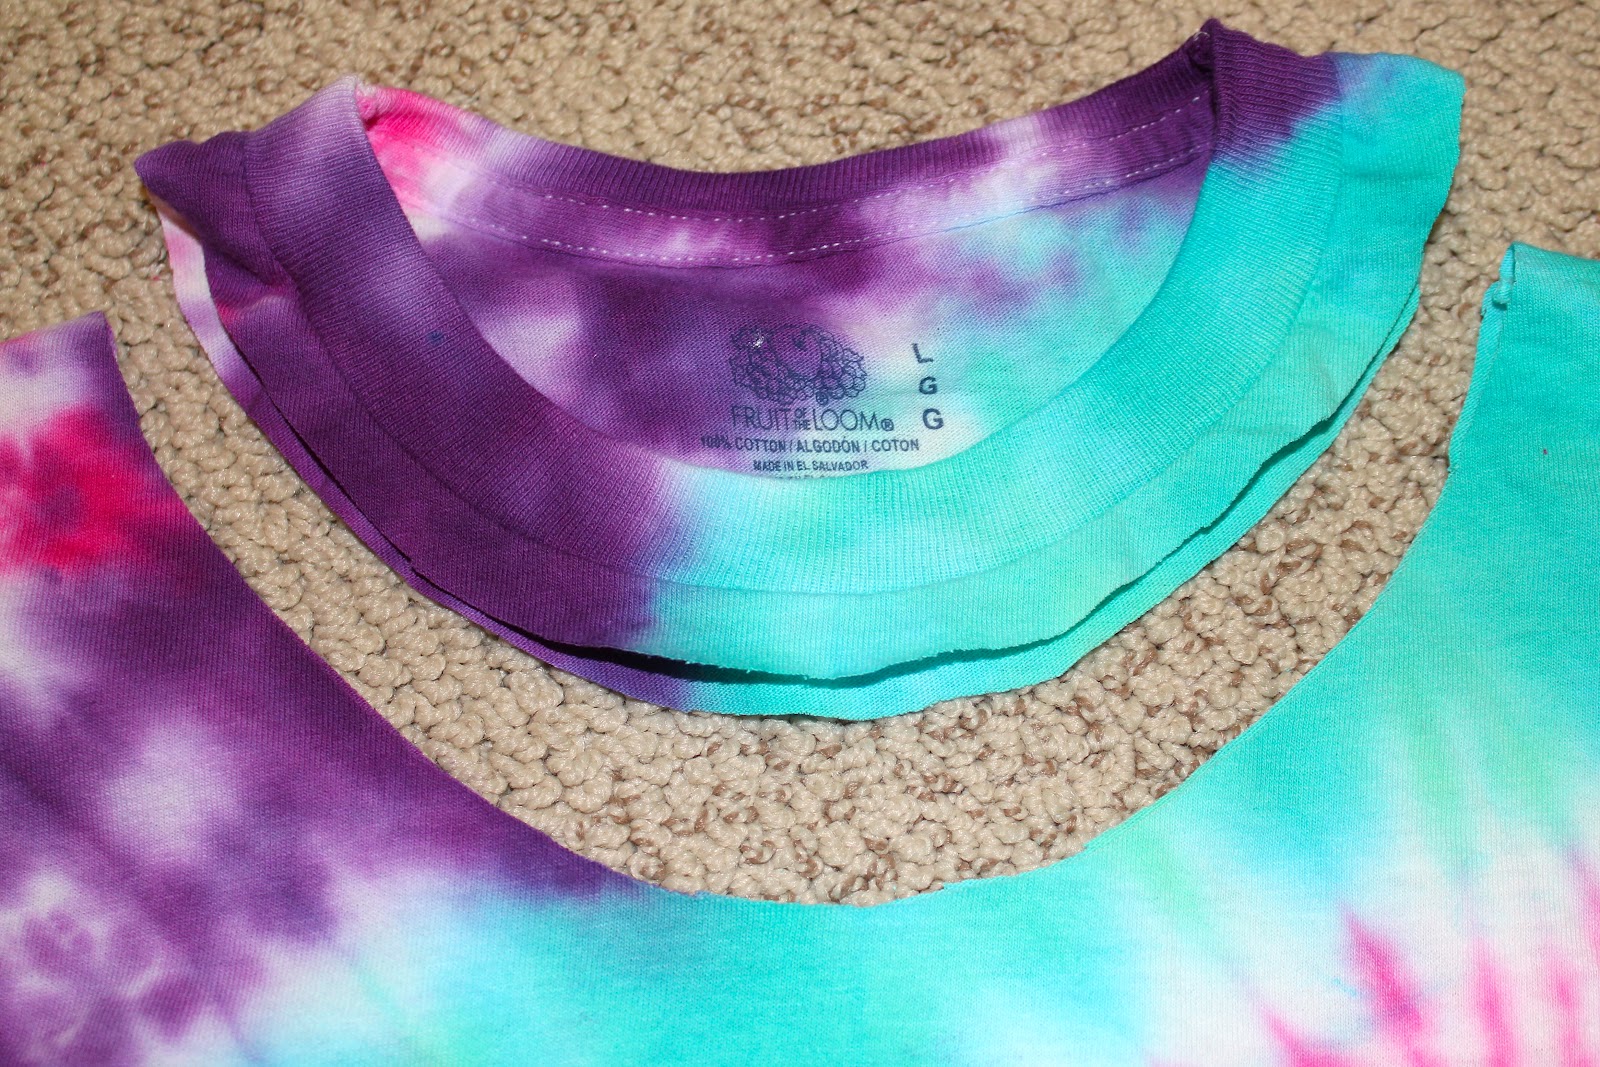
4. Now, flip your shirt back over and cut off your collar. At first, I only cut about a 1-inch collar off, but I ended up cutting it more. So, I would recommend cutting about a 2-inch collar.
5. Flip to the back of the shirt again. Cut a straight line right below your collar, cutting your racer back off.
6. Divide and cut your loose piece of racer back fabric into 3 strips. Tug on the strips to make them longer and easier to braid.
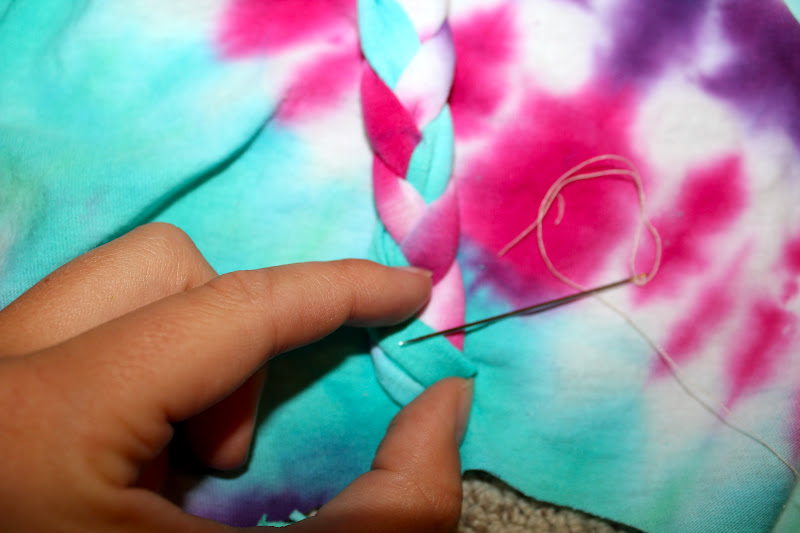
7. Braid your 3 strips all the way to the top. Sew a few stitches at the end of your brad to hold it together.
8. Now take your collar and fold it in half to find the center. Make a small mark where the center of your collar is.
9. Make a few stitches connecting your braid to the center of your collar.
10. Now cut a strip of fabric from one of your cut-off sleeves, about 1 ½ inches wide and 4 inches long. You can pull on both sides of it to make it longer.
11. You’re going to use this fabric to cover your stitching. Stitch the end of the strip to the connection, and wrap it around covering your previous stitching. Connect your fabric at the end to complete your shirt!
There you are- your own tie dye swimsuit cover-up!

Thursday, June 20, 2013

Nutella Oat-Nut Bars!


Hey everyone! It's July and as you might know, I'm a huge fan of Nutella so how could I pass these up? 


Ingredients
  • 2⅔ cups oats
  • 1 cup flour
  • ½ tsp kosher salt
  • ½ cup light brown sugar
  • ½ cup butter (room temp.)
  • 1 tsp vanilla extract
  • ½ cup milk
  • ½ cup semi-sweet chocolate chips
  • ½ cup chopped hazel nuts
  • roughly ½ of a 13 oz. jar of Nutella
Instructions
  1. Preheat oven to 350 degrees.
  2. Cream together butter, brown sugar and vanilla.
  3. Add milk, mix. Then add oats, flour & salt.
  4. Once thoroughly mixed fold in the chocolate and nut, until evenly distributed.
  5. Place mixture in a greased 9 x 13 baking dish.
  6. Spread out with a silicone spatula or the back of a spoon until the surface is flat.
  7. Bake for 22-25 minutes.
  8. While still warm frost the top with Nutella.
  9. Serve in small bars. Size similar to fudge.

Tuesday, June 11, 2013

Multicolored Fingernails

Hey! Happy summer all :) Here's some great summery nails that look perfect for spending a week up at the cottage! There wasn't much of a explanation given so try your best and good luck. 
July

(source is on the picture)


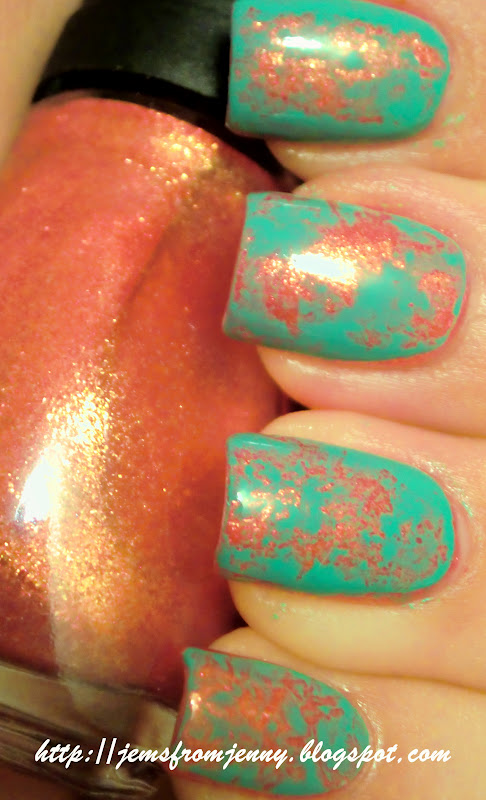
Paint your nails with a base color and let them dry completely. 
Then come back and paint a layer of another color on top, and before it dries, you dab pieces of wadded up saran wrap on top lightly to get the faded effect (as seen above). Then add top coat.

Wednesday, June 5, 2013

Double Sided Braid Tutorial

Hello :) I am now officially done with all my years of middle school! Today was our last day :/ It's really bittersweet, but high school is an excited experience too!
Anyway, here's how you can do a double sided braid in eight easy steps. My hair isn't long enough for it, but I'd love to see Seana do it sometime on herself cause her hair is pretty long and it might look good on her. Good luck :)
July

*SOURCE


Sunday, May 26, 2013

Loaded Cauliflower Casserole

Hey! Sorry I haven't posted in a while. The end of the school year is coming up and I've been super busy with all that! Here's a recipe I found on Pinterest and it's supposed to be like mac and cheese but with cauliflower... Good luck and may the odds be ever in your favor!
July

*SOURCE


2 lbs cauliflower florets
8 oz shredded sharp cheddar cheese, divided
8 oz shredded Monterey Jack cheese, divided
8 oz block cream cheese, softened
4 tablespoons heavy cream
2 bunches green onions, sliced (1 1/2 cups)
6 sliced bacon, cooked and crumbled
1 clove garlic, grated
Salt & pepper to taste

Preheat oven to 350 degrees.
Steam cauliflower florets until tender.

While cauliflower steams, cream together 6 oz of the shredded cheddar, 6 oz of the Monterey Jack, cream cheese, and heavy cream.  
Stir in sliced green onions, chopped bacon, and garlic.
Set aside.

Drain any liquid from steamed cauliflower and add to cheese mixture.
Stir cauliflower and cheese mixture together.
Taste for seasoning, and add as necessary.
If you want a finer texture, give a few mashes with the potato masher.
Pour into a 2-3 quart casserole and sprinkle on remaining cheddar and Monterey Jack cheese.
Cover dish with foil and bake for 25 minutes; remove foil and continue to bake until cheese is brown and bubbly.
Enjoy!

Wednesday, May 22, 2013

Braided Headband Tutorial

SOURCE

I sometimes sport this look to school, and a lot of my friends freak out and ask me how I did it. In reality, it's quite simple.

Here's how to do it:


Monday, May 6, 2013

How To Make A One Direction T-Shirt

Hello, lovelies! I was browsing around the internet, and came across a tutorial for making a One  Direction logo T-shirt. I've yet to try this out, but I hope to someday. Let me know how it goes for you!

Thanks to Michelle and Camella who posted this tutorial originally here.


MATERIALS

- Acrylic paint (red, black and white)
- Paintbrushes (thick ones are best)
- Newspaper
- Sticky Tape
- Transparency sheet 
- Logo image
- Scissors or stencil knife

METHOD

Step 1:
(We chose logo 3 
g)

Step 2:
Copy Paste the chosen logo and paste it on Microsoft Word ( The Orientation of the page is Landscape)

Step 3:
Get a Transparency Film sheet and put it in your printer (This is the one we used)
Step 4:
and then just print it out on it, It should look like this:
Step 5:
Cut out the stencil using scissors/stanley knife. Remember to cut it neatly for a better result! We used a 
stanley knife first to cut a but off the particular word and then used the scissors for a steadier cut.
Step 6:
Then get your top and put newspaper in the inside of the top so the paint doesn’t go through to the 
other side 

Step 7:
Get your cut out stencil and place it on the top however you like it and put sticky tape at each end or 
wherever until it’s secure

Step 8:
Get your Acrylic paints out (It’s best to use this type because it dries faster and gives a better result)
Step 9:
We used these paintbrushes below (the thicker the brush the better and quicker)
Step 10:
Dab the paintbrush onto the stencil until all areas are covered with paint (Like the picture below) 
NOTE: YOU HAVE TO DAB SO THE STENCIL WON’T MOVE!
 
Step 10:
Use a smooth brush to smooth out the paint if you want too (We did)
Step 11:
Wait for the paint to dry and then pull off the sticky tape and DONE! It should turn out like these ones:
Step 12:
Remember before putting it in the wash put a cloth on top of the painted areas and iron it. This will 
prevent the paint from fading away when you put it in the wash! :)