Showing posts with label hair. Show all posts

Wednesday, September 24, 2014

Seana's Must-Haves (Fall)

Hello lovelies!

It's been a while, but I'm back with something new! Since fall is either already here or just around the corner for you, I'm going to do a bit of a roundup of the things that I feel are must-have items for fall.

Let's get started then, shall we?

---------------------

Fashion:


Chunky scarves are definitely one of the accessories that I can't live without during fall. They're just so cozy and warm, and they make a great fashion statement.


Oversize sweaters. Even though they're not always the most form-fitting or things like that, I feel like everyone could use a good oversize sweater to keep them warm and happy this fall. Pair it with some jeans and boots, and voila! Instant fabulous.


Speaking of boots, those are also something that I think fall calls for. They give you a sort of cowgirl-chic look that I think looks good on everyone. And they keep your ankles warm, which is a bonus!


I myself own a leather jacket, and I'm such a huge fan of it. It's perfect for fall, and it makes a statement if you pair it with a plain t-shirt and jeans.

Hair:


Braids are definitely a lovely way to wear your hair in the fall. It keeps your hair under control during windy days, and they're super versatile.


I've always been a fan of the classic messy bun, even though it's not as effortless as it may look. Either way, messy buns are a perfect accessory to your fall outfits. You can polish the messy bun up for a sophisticated touch, or make it messier for casual wear.

Makeup:


I confess, I'm turning into a bit of a makeup junkie. My collection of products has started to expand, and I'm becoming a fan of different trends too that I hadn't seen before. One of those classic trends being the cat-eye, winged eyeliner. It's such a classy look that's been around for a while, and even though it takes a while to perfect, I love it.


For fall especially, if you want to be bolder, pairing a golden colored eyeshadow look and a berry lip color is always gorgeous. I saw this recently on a YouTuber's channel (Zoella is her name if you're curious), and I thought it looked stunning. Definitely a fall look!

------------------

And lastly, just because, I'm going to add apple cider to my list of fall must-haves. Apple cider is a staple of fall, and I never go a fall season without it.

What are you rocking this fall?

That is all.

Cheers,
Seana

Saturday, May 31, 2014

Halo Braid Tutorial by Zoella

Hey guys! I know I shared something similar to this in the past, but here it is in video form. Zoe, the maker of the video, explains this so it's very easy to understand and she also shares which products she uses to perfect her Halo Braid. 
-July


Tuesday, April 22, 2014

Tuck and Cover Gatsby Style Hair

Hello! It feels brilliant to be back with you again. I've been slacking off in the blogging department lately, I know, and I'm sorry that today's post will be another quick one. 
Because I just read the book about a month back, here's a style based on the looks of the time period. I think it's cute and pretty simple, so try it out!
-July


Wednesday, March 26, 2014

Half Crown Braid Tutorial

This tutorial is honestly a lifesaver for those of you who don't have much time in the mornings before school. It's cute, quick, and best of all, easy. 
-July


Monday, March 3, 2014

Reverse French Braided Bun Tutorial

Hair can be the most difficult thing to get right. Each person has a different style and not every hair-do looks good on everyone, so things can get a little sticky when you're trying to figure out the perfect way to dress your up hair. This is something I think looks great on everyone. It's perfect for a day at school, a shopping day, or even a date with a special someone *wink wink*. Without further ado, here is the reverse French braided bun. 
-July


1. Flip your head upside down and brush your hair to smooth out any cowlicks.

2. Take a two-inch section from near the nape of your neck and separate into three pieces.

3. Begin French braiding, working from the bottom up rather than the reverse. It might take a few tries, but you'll be able to feel if the braid is coming out straight without looking in the mirror!

4. Once your braid reaches the crown of your head, smooth the rest up into a high ponytail.

5. Twist the pony around itself to form a ballerina bun and pin in place.

6. An oversized bow clip is totally optional, but it helps hide any bumps at the top of your braid—plus, it just looks adorable!

Monday, February 3, 2014

10 Days of Short Hairstyles

Hello lovelies!

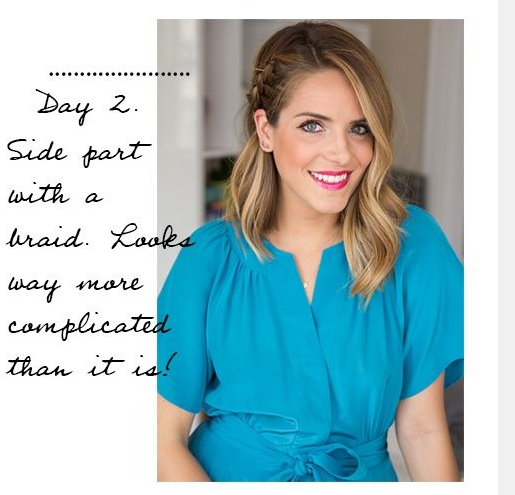
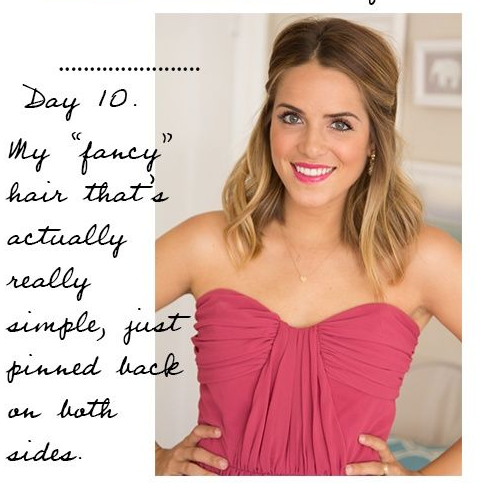
So maybe you've been thinking of getting your hair shorter. It's scary. I know from personal experience. Going from mid-back length hair to a bob is the most terrifying moment ever. In case you're thinking of getting your hair cut but you don't have any clue what hairstyles you can do with it after it's short, I've found 10 different styles that you can use to keep your short hair from feeling boring.


*Please note that these pictures are not mine, nor do I take credit for them. You can find the original source here.

That is all.

Friday, January 31, 2014

In the Spotlight: Braids

Today's ItS post is going to focus on one of my go-to hairstyles. Anything with braids is a way to make something really simple look like you spent hours accomplishing. Braids add different dimensions to a boring hairstyle, and they also add a little bit of your own flair to a style. Here are some of my favorites.


Friday, January 17, 2014

Guest Post: Destiny Skye with Bandana Waves

Hello lovelies! As you might remember, July and I decided to start a once a month guest post where we bring in an awesome person to sprinkle their creative magic here at the Creative Clique. So without further ado, here's Destiny with an awesome wavy hair tutorial! (:

Hey everyone, I'm Destiny Skye! First of all, thanks to Seana and July for letting me guest post. I'm a sarcastic, homeschooled teenager who lives somewhere in the Northern Hemisphere. I love Jesus, books, music, chocolate and Doctor Who (yes, in that order).

Also, I'm obsessed with getting my hair curly/wavy without heat or hair products. My hair isn't too long, about to my upper back and I have a bit of trouble getting it wavy. I found this video in one of my endless searches and here's the tutorial. The pictures are mine and the video I found online.

So here are....Bandana Waves!


Hope it worked and y’all liked it.

Allons-y!

~D. Skye <3

Friday, January 3, 2014

Flat Iron Curls (Easy Edition!)

I myself have finally mastered flat iron curls normally, but I've found an easier version for those of you who want a similar look without the hassle of trying to wrestle with your flat iron for hours.

Step 1: 
Start out with dry hair. It can be Day 2 hair (meaning you haven't washed it for a day), or it can be freshly washed. Either works.

Step 2: 
Take your index finger and middle finger and place them together, wrapping a 1-2 inch section of hair around them.

Step 3:
Gently take the wrapped hair off of your fingers. You should have a loop of hair similar to the picture.

Step 4: 
Take your flat iron and clamp it shut on the loop of hair. You can clamp it a few times or you can try leaving it clamped for a little longer amount of time. I would recommend not leaving the flat iron on your hair for too long or it will burn your hair.

Step 5: 
Repeat on the rest of your hair and voila! Gorgeous, beachy-esque waves.

NOTE: 
If you're worried about hair damage from the flat iron's heat, pick up some heat protectant from the store. If you spritz that all over your it will help to protect your hair from being damaged.

Monday, November 25, 2013

Winter Is Coming (A Side Updo Tutorial)

Living in the north of the US means one thing: We get snow. And just this weekend we got some snow, and it was one of the most gorgeous things I've seen in a while. With winter already around the corner (or for some of us, it's already here), and that means it's time to break out the cozy sweaters and delicious peppermint goodies.

And some of you will definitely have some Christmas, New Years, and other holiday parties that go along with winter. Struggling to find a hairstyle to go with your outfit? I've found a tutorial that's perfect for any occasion and looks adorable.


Happy winter!
♡ Seana

Monday, October 21, 2013

Triple Headband Braid Twist

Hello, lovelies! Apologies for the absence of new posts, but I've got my hands full with schoolwork and other crazy things that come along with being in high school. (: But now I'm going to share with you a gorgeous hairstyle that's essentially just three headband braids and a little poof.


Necessities:
- Hairbrush
- Rat tail comb (or any other teasing tool)
- Elastic hair bands
- Bobby pins
- Hairspray (optional)

Steps:
*Brush out your hair so that there are no tangles and knots.*

1.) Divide your hair as if you were going to create a half-up hairstyle. Tease that section of hair lightly, smoothing over the top to hide the teasing and making it look sleeker and not so gnarly.

2.) Gently twist the teased section and pin it on the back of your head with bobby pins.

3.) Divide the rest of your remaining hair into two parts.

4.) Take a little section of hair (near your ear) from one of the two parts and braid it with a regular 3-strand braid.

5.) Take that braid and drape it across your head like a headband, and pin it on the other side, hiding the end of the braid underneath a little bit of your hair.

6.) Braid the two remaining sections, repeating the headband style that you did for the first one. Hide the ends and bobby pins underneath the other braids.

7.) Finish with hairspray to set the look and tackle any tricky flyaways.

Voila!

Saturday, September 7, 2013

Heatless Waves

Perhaps you can tell that I'm kind of obsessed with ways to get my hair lovely and wavy without messing with curling irons, flat irons, and whatnot. So I found this tutorial by a YouTuber who has an easy method for heatless curls.

SOURCE

NOTE: If you don't have the hair clips she uses, bobby pins work just as well!

Friday, September 6, 2013

Chunky Beach Waves

Hello one and all! I'm going to quickly apologize for my summer absence from The Creative Clique. Sorry. It was all I could do to keep up on my regular blogging schedule without this on top of it, but now that I've got my lovely laptop back, I think I'll be able to start my share of posts again. Huzzah!

So. Beach waves. Here we go!

SOURCE

Tools:

- Flat iron
- Hairspray (optional)
- Heat protectant spray (optional)

Steps:

OPTIONAL: Take your heat protectant spray and spritz it all over your hair to protect it from being singed off. Brush hair to distribute evenly.

1.) Get your flat iron all heated up and then grab a chunk of hair (small, medium, or large, depending on how tight you want the waves).

2.) Wrap that hair around one or two fingers, depending on how big you want your waves. Keep in mind that how big of a chunk of hair you take will also affect this.

3.) Pull the loop of hair off of your fingers, making sure that the loop doesn't unravel. Flat iron the loop of hair.

4.) Open the flat iron and release the hair.

5.) Repeat on the rest of your hair.

Refer to picture tutorial below if none of that made sense!


Wednesday, August 21, 2013

Braided Bun?

Hey everyone! Summer is coming to a close and I guess I'm ready for high school but a bit nervous too.... Anyway, remember when I went to the 8th grade banquet? Well this is kind of what my hair looked like but not really.... Heehee. 
It's a really pretty hair style though so try it!
July


Tuesday, August 6, 2013

Ponytail Braid

Hey! It's July :) Do you have any fun plans left for summer? I hope so! I thought this was very cute and pretty simple looking if you know how to French braid. If not, look it up on YouTube, there are some really good tutorials there for French braiding!
July

*source


Friday, July 19, 2013

Queen's Braid

Hola (hello)! Como estas (how are you)? This is a queen's braid and since there wasn't an explanation for it, I'll explain for you. 

It's exactly like a French braid, except you only add hair from one side! Very simple and easy to do if you can French braid. Good luck!
July

*source: Pinterest


Wednesday, June 5, 2013

Double Sided Braid Tutorial

Hello :) I am now officially done with all my years of middle school! Today was our last day :/ It's really bittersweet, but high school is an excited experience too!
Anyway, here's how you can do a double sided braid in eight easy steps. My hair isn't long enough for it, but I'd love to see Seana do it sometime on herself cause her hair is pretty long and it might look good on her. Good luck :)
July

*SOURCE


Monday, April 22, 2013

Medieval Braid

I was browsing Pinterest..... again.... and I found this really cute braid! I don't think just anyone would like it, but I thought it was adorable anyway. If it was me though, I wouldn't've left any hair at the bottom, I would have braided it all, but that's just me :P Let me know how it works if you try it! My hair isn't long enough :/
~July

Source

Wednesday, April 17, 2013

Les Mis Braid: Seana Edition

Now, maybe you remember me posting a tutorial about how to do Cosette's braid from Les Miserables. Then again, some of you have no idea. (You can click here for the original post.)

I said that I might try it out on myself sometime, and guess what? Yesterday, I did. Here are the results of my experiment.

Attempt #1: In which I didn't braid the ribbon in very well


Attempt #2: In which The ribbon was braided in better, but my hair lost some of it's wavy poof.


If you have a chance, try out the Les Mis braid! Let me know how it goes for you, and if you'd like, go ahead and send me a picture of it to seana.j.vixen@gmail.com

Happy braiding!

Monday, April 15, 2013

Les Mis Inspired Braided Hair

Hello, lovelies! Hope your day was awesome. This weekend I watched Les Miserables, and one of the characters, Cosette, had a really gorgeous hairstyle that I wondered if I could recreate. Thankfully, I found a tutorial online for it!

SOURCE


(For the instructions that go with each picture, scroll down to the blue font!)


So there you have it! An awesome tutorial for Cosette's hair.

Let me know how it goes for you. I'll be trying it out myself sometime if I have time.

*Please note that I had nothing to do with creating the hairstyle or making the tutorial. That credit goes to The Shine Project, to which I linked at the beginning of the post as my source. Thank you Shine Project!