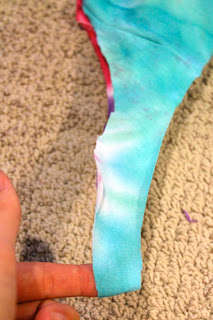
Hello! It's July again and since it's summer, here's a cute swimsuit coverup that you can make by yourself!
Before & After
Supplies needed:
A white t-shirt (I bought a large, and I usually wear a medium t-shirt)
Tie Dye kit
Needle & thread
You can tie dye your shirt however you want, but if you want a spiral effect like mine, here are the steps!
1. Pinch your shirt wherever you want the center of your swirl to be.
2. Swirl your shirt around your pinch until it’s compact.
3. Divide your shirt into 6 sections with 3 rubber bands.
4. Squirt your dye in each section. Try not to overlap your colors.
5. Place shirt in a plastic bag for about 8-14 hours.
6. Rinse shirt in the bathtub.
7. Wash your shirt by itself on hot in a large sized load.
As for the braided racer back steps:
(adapted from TheSorryGirls on Youtube)
Lay your shirt out flat.
1. Starting about 1 ½ inches below the bottom of your sleeve, cut one sleeve off of your shirt, creating a U-shape.
2. Use your cut-off sleeve as a pattern to cut off your other sleeve. (Save those sleeves for later!)
3. Flip your shirt over so the back is face-up. Cut the back sleeves of your shirt, making the holes bigger ONLY in the back, making a wide racer-back shape.
4. Now, flip your shirt back over and cut off your collar. At first, I only cut about a 1-inch collar off, but I ended up cutting it more. So, I would recommend cutting about a 2-inch collar.
5. Flip to the back of the shirt again. Cut a straight line right below your collar, cutting your racer back off.
6. Divide and cut your loose piece of racer back fabric into 3 strips. Tug on the strips to make them longer and easier to braid.
7. Braid your 3 strips all the way to the top. Sew a few stitches at the end of your brad to hold it together.
8. Now take your collar and fold it in half to find the center. Make a small mark where the center of your collar is.
9. Make a few stitches connecting your braid to the center of your collar.
10. Now cut a strip of fabric from one of your cut-off sleeves, about 1 ½ inches wide and 4 inches long. You can pull on both sides of it to make it longer.
11. You’re going to use this fabric to cover your stitching. Stitch the end of the strip to the connection, and wrap it around covering your previous stitching. Connect your fabric at the end to complete your shirt!
There you are- your own tie dye swimsuit cover-up!


